AdityaDees: django

Hot

https://publishers.chitika.com/

Contact us for advertising.
Showing posts with label django. Show all posts

20 November 2019

Cara Membuat Project Baru Django - Coding Rakitan

22:47 0

Sebelumnya dalam postingan Mengenal Apa itu Django dan Cara Penginstalannya kita telah menginstall django. Pertanyaan yang muncul selanjutnya adalah bagaimana cara memulai membuat project dengan django.

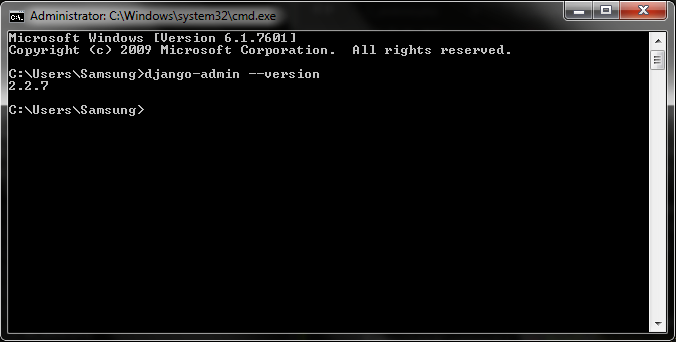
Caranya sangat mudah anda tinggal membuka CMD atau Command Promt lalu arahkan ke folder mana anda ingin membuat project baru. Setelah itu ketikkan perintah dibawah pada cmd.

 
django-admin startproject nama_web

Nama_web bisa anda ganti sesuai keinginan anda. Jika proses pembuatan selesai maka di folder yang tadinya anda arahkan untuk membuat project baru akan muncul direktori dengan struktur seperti berikut.

gambar

Pada contoh struktur di atas saya membuat project baru dengan nama belajar sehingga muncul folder baru dengan nama belajar. Berikut adalah penjelasannya.
  • Belajar - merupakan folder root atau utama yang menampung semua kebutuhan project web yang dibuat.
  • manage.py - file ini merupakan server yang akan mengolah project web yang dibuat. Agar server web dapat berjalan file inilah yang pertama kali di eksekusi ke CMD.
  • belajar/__init__.py - file ini merupakan file kosong yang menandai bahwa direktori ini adalah sebuah paket (python package).
  • belajar/settings.py - Seperti namanya file ini berisi konfigurasi project seperti database, auth, hingga language code.
  • belajar/url.py - file ini adalah tempat untuk mendeklarasikan url fungsinya sama dengan web.php pada routes laravel.
  • belajar/wsgi.py


Setelah project baru selesai dibuat maka pelajaran selanjutnya yang perlu diketahui adalah cara menjalankan project yang telah dibuat. Caranya sangat mudah anda tinggal menjalankan file manage.py dengan mengetikkan perintah python manage.py runserver dan tekan enter. Selanjutnya buka browser anda dan masukkan url "localhost:8000" dan tampilan pertama akan muncul seperti berikut.


Read More

Mengenal Apa itu Django dan Cara Penginstalannya - Coding Rakitan

22:41 0

Python merupakan salah satu bahasa pemrograman yang populer di kalangan para programer. Tidak hanya dapat digunakan untuk membangun aplikasi desktop, Python juga dapat digunakan untuk membangun aplikasi berbasis web. Salah satu framework website yang menggunakan bahasa python adalah Django.

Django adalah sebuah framework full-stack yaitu istilah yang berarti django meliputi sisi front-end dan juga back-end. Susunan tahapan yang harus anda lalui untuk dapat menggunakan framework django : Install python -> Install PIP -> Install Django.

Install Python

Agar dapat membangun web dengan framework django terlebih dahulu anda harus menginstall python. Anda dapat mendownload di halaman resminya disini. Setelah anda berhasil menginstall python, silahkan lakukan pengecekan untuk memastikan phyton sudah siap digunakan. Caranya buka Command Promt atau CMD lalu ketik "python --version", jika berhasil akan muncul informasi versi python seperti gambar dibawah.


Install PIP

Lanjut ke tahap penginstalan PIP yaitu sebuah pengolah package untuk python. PIP ini sama fungsinya seperti Composer untuk php atau NPM pada Node js. Pengolah package ini nantinya diperlukan untuk mendownload Django. Cara penginstalan PIP cukup mudah, silahkan download file get-pip.py, setelah itu buka cmd dan arahkan ke folder file get-pip.py berada. Selanjutnya ketik perintah "python get-pip.py" di cmd dan tunggu hingga proses instalasi selesai. Untuk dokumentasi lengkap penginstalan PIP dapat anda lihat disini.

Install Django

Tahap terakhir adalah menginstall Django cara sangat mudah anda tinggal buka CMD lalu ketik "pip install django" lalu tunggu hingga proses selesai. Untuk memastikan django telah terpasang, ketikkan perintah "django-admin --version" di CMD, jika muncul versi django seperti gambar di bawah maka selamat django anda siap digunakan.


Sekarang anda bisa memulai untuk membuat project dengan django. Untuk cara pembuatan project baru menggunakan django anda bisa melihatnya di Postingan : Cara Membuat Project Baru Django.

Read More

13 April 2014

An (Relatively) Easy Way for Installing Social Feed Manager on Mac OSX

15:45 0

On Monday, March 24, 2014 at Code4Lib 2014 Conference in Raleigh, North Carolina, i was fortunate to get the opportunity to learn Social Feed Manager (SFM), directly from the developers, Daniel Chudnov, Daniel Kerchner and also Laura Wruber from George Washington University (thank you for all of you for patienly guide me to get SFM working). SFM is a django application for managing multiple feeds of social media data. It's been a long time i'm searching for this kind of software to grab social media feed from Twitter. I know that Twitter already provide an API to fetch tweets, but i'm too lazy to learn the API :D, so SFM is great solution for me.


This article will try to explain step by step on how to install SFM on Mac OSX. Why Mac OSX? because i use Mac OSX on Macbook Air everyday for my work. Currently at the time this article was written, i'm using Mac OSX version 10.7.5 (Lion) with latest update from Apple. Below are the specs of my Macbook Air:


Ok, lets get it started, before installing SFM on Mac OSX you NEED to have/install these requirements:


  1. A working (and fast if you have) Internet connection

  2. A Twitter account!

  3. Latest Xcode. After finished installing Xcode, open the Xcode.app and accept the Xcode license agreement.

  4. Latest PostgreSQL database server for Mac OSX. I prefer Postgres.app, "The easiest way to get started with PostgreSQL on the Mac" <- that's what they said about it, and i think it is true :)

  5. and after installing Xcode and PostgreSQL, you need to install Homebrew, a package manager similiar to apt on Ubuntu for Mac OSX.


After successfully installing above three softwares, now you must open Terminal application (press Command+Space button and type "Terminal" if you're too lazy to find it :D) and do the "geek typing" works :D. If you


First installing python package manager, "pip" by typing:

$ sudo easy_install pip


Second, you need to install python "virtualenv" package by typing:

$ sudo pip install virtualenv

with virtualenv you can localize all required python library dependacies only on project directory (in this case is SFM).


Now, we start to install the SFM itself by cloning the source code directly from the SFM GitHub repository by typing:

$ cd
$ git clone git://github.com/gwu-libraries/social-feed-manager.git
$ cd social-feed-manager

In this example, we install the SFM on our home directory. You will see that there is social-feed-manager directory on our home directory now.


Currently, we are inside the social-feed-manager directory. We will create a virtual environment directory inside this folder, and we name it ENV by invoking below commands:

$ virtualenv --no-site-packages ENV
$ source ENV/bin/activate

You will see there is something a bit different with our command shell, it is appended with "(ENV)" which means that we are already inside our python sandbox/virtual environment.


So far so good? Hopefully! :D. Don't worry we will see our SFM working in a few hour to go hahaha, just kidding, in a "few steps" to go. Next step is preparing our PostgreSQL database for SFM to store its data, so we will launch our Postgres.app application and click "Open psql" button to open "psql" terminal. On psql console type below commands:

CREATE USER sfmuser with createdb PASSWORD 'sfmuser_secret';
CREATE DATABASE sfmdb WITH OWNER sfmuser;

Remember we create a new database user/role named "sfmuser" with password "sfmuser_secret" and database named "sfmdb". We will use these values on SFM configuration file later.


Now go back to the first Terminal application where we installing SFM. We will install all python library dependancies needed by SFM such as Django, Django Social Auth, Oauth, and etc. using below command:

$ pip install -r requirements.txt

Just wait until all process finished, and if everything is running smooth you'll see like this:


Continue! now type the following commands:

$ cd sfm
$ cp sfm/local_settings.py.template sfm/local_settings.py
$ nano sfm/local_settings.py

Now you'll see that you're opening the local_settings.py file using nano text editor (yes, you can use another text editors to edit the file if you're allergic to nano), and you must edit some value inside it according to your twitter app configuration. To create your Twitter app, login to https://apps.twitter.com using your Twitter account and create new application in https://apps.twitter.com/app/new. Fill the new application form like mine below:

After creating your new Twitter application will get an API Key like this.


On local_settings.py you need to change these lines according to your database settings


DATABASES = {
'default': {
'ENGINE': 'django.db.backends.postgresql_psycopg2',
'NAME': 'sfmdb',
'USER': 'sfmuser',
'PASSWORD': 'sfmuser_secret',
'HOST': 'localhost',
'PORT': '5432',
}
}

You MUST also change below lines according to your Twitter app API settings
TWITTER_DEFAULT_USERNAME = 'YOUR TWITTER USERNAME'
TWITTER_CONSUMER_KEY = 'YOUR TWITTER API KEY'
TWITTER_CONSUMER_SECRET = 'YOUR TWITTER API SECRET'

Save the changes by pressing Control+X and then press Y (if you're using nano).


Now you must edit the wsgi.py file by typing these commands:

$ cp sfm/wsgi.py.template sfm/wsgi.py
$ nano sfm/wsgi.py

Remove "#" in front of lines like below and change the ENV line so it will be look like this :
import site
ENV = '/Users/arienugraha/social-feed-manager/ENV'
site.addsitedir(ENV + '/lib/python2.7/site-packages')

Don't forget to save the changes by pressing Control+X and then press Y (if you're using nano).


Next step we will create setup a database to be used by djago by typing this command

$ ./manage.py syncdb

You'll be asked to create superuser for SFM administration page (DON'T USE YOUR TWITTER USERNAME!). In this article i create superuser with username "admin" and password "admin". If everything went smooth you'll something like this:


Next run this:

$ ./manage.py migrate


Hoorrayyyy!!! we almost finished! Next we need to run the Django built in web server (yes, you don't have to use Apache or another web server for development and testing) so we can access SFM administration UI. Run below command

$ ./manage.py runserver

Open your web browser and go to http://localhost:8000/admin to access SFM administration UI. By default Django web server will run on port 8000. If you want Django to run on another port, say it port 9090, just run the command like this :
$ ./manage.py runserver 9090

and go to http://localhost:9090/admin on your web browser! You'll see something like this on your web browser if everything is OK :


Login with username we already create on previous "syncdb" step, in this example the username is "admin" and the password is "admin", and you'll see webpage like this:


Fiuuhhhh!!! now we have our SFM installed and we are ready to grab Twitter feeds we want. The question is HOW DO I GRAB THE FEEDS THAT I WANT? Relax bro, relax :D. Suppose we want to grab tweets from Twitter user named @slims_official, what we must do is adding her/his Twitter screen name on http://localhost:8000/admin/ui/twitteruser/add/ and fill it on Name form field like this:


then click "Save" button at the bottom of the screen. Now on Terminal, run this command to grab about 3200 latest tweets from this user:
$ ./manage.py user_timeline

and you'll see something like this on your Terminal screen:

You see that SFM grab 200 tweets each time from the latest to the older tweets.


That's it hopefully you will find this article useful. Next i will try to write an article on how to use/utilize feeds from SFM with PHP. (Please don't ask me about Python and Django, i can only write standard "Hello World" using Python :D)

Read More

https://payclick.com/

Contact us for advertising.